

Top 7 Wedding Photo Editing Tips for Professionals
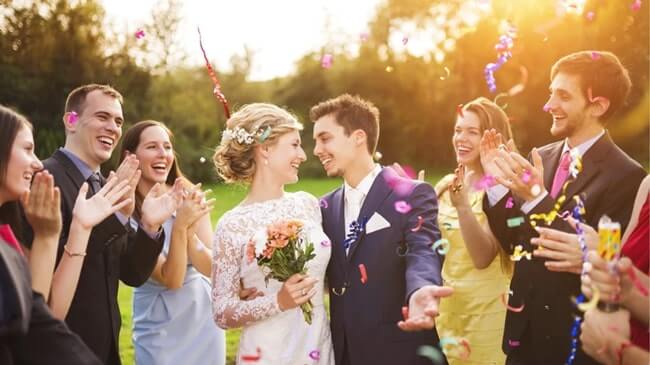
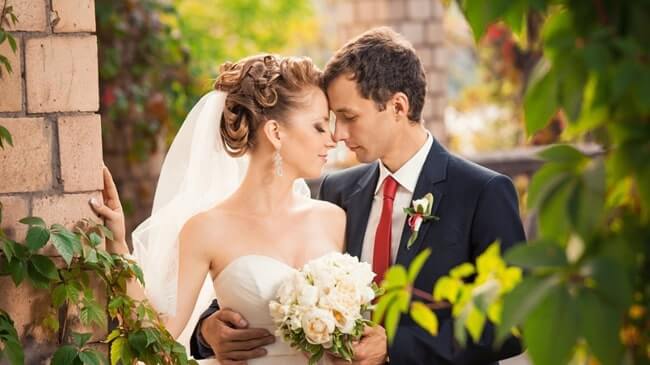
A wedding day is a special day in every person’s life. That’s why couples go for wedding photography to capture the emotional moments of that day and make it remembered for the rest of their life. The photography and the photo editing techniques combined play a cognitive part in executing a successful wedding photography project. However, wedding photo editing techniques are not similar to other photo editing methods.
Here, the photo editors try to bring out the emotions of that day and ensure that every moment looks lively and compact. But this is where most photo editors fail. Instead, they try the conventional photo editing techniques they use for product photo editing or eCommerce photo editing.
However, you can also professionally edit wedding photos by following simple tips. And this is what we are going to discuss in this article. Here, we will learn about the 7 simple but very effective methods professional editors use to edit wedding photos. So, without further ado, let’s start our journey.
Wedding Photo Editing Tips For Professional Photographers
Professional wedding photographers apply different image editing methods to remove inconsistencies in the photos. Also, they use Clipping Path Service and image editing methods to enhance the quality of the image and create dramatic effects. However, most wedding photo editors apply the following methods to provide flawless and dreamy photos. So let’s see how these services can level up your wedding photography career.

Eliminate Noise
Noise may be caused in the wedding photos due to the low light shooting or the mechanical issues of the camera. When your photo shoots in a low-lighting environment, you need to increase the ISO value of the camera. Thus, you will get a grainer photo, which may give you a different look for your model. So, you need to remove the digital noises to give the groom and bride an elegant look.
Your picture will seem grainy when you set your camera to a high ISO setting. Sometimes having a grainy shot is inevitable, so noise correction is necessary. However, first, you must determine which type of noise you need to reduce. There are two types of noise you can find in a photograph. One is color noise, where the image shows a lot of colors instead of a solid color. And the other one is the luminance noise which makes the image look excessively bright.
Here’s how to reduce noise in photoshop:
- Launch the noise reduction feature. When you click on the tab, you will find an option that reads Reduce Color Noise. (Click on the Filter menu, scroll down to the Noise tab, then click on Reduce Noise.)
- Drag the slider gradually to the right until the picture covers the noise.
It will take more than a few mouse clicks, and a slider dragged to reduce luminance noise since it is a little more complicated. However, from creative firms like Clipping World, you may get further information on more in-depth types of Photo retouching service. In addition, you can access the agency’s guidelines and blogs on its website, which can help you become better at picture retouching.
Use A Vintage to Create Focus

Even though vignettes are one of the oldest Photoshop methods employed by photographers, they will always be in trend. Adding a vignette may direct the viewer’s attention away from the surrounding area and into the image’s central subject. These sharpen the subject’s focus. To intensify the retro appearance, add a vignette with the Curves adjustments.
Remove Blemishes
Blemishes are common in any photo. But, it is necessary to reduce blemishes as much as possible to make the bride and groom look stunning. So, you apply the Photoshop Clone Stamp or Healing Brush tool to element the flaws that can affect the beauty of the photo. Let’s look at a quick comparison of the Clone Stamp and the Healing Brush to choose the best one for your photos.
Clone Stamp
Imagine you would eliminate a few spots on the bride’s face. Then, when you decide on a faultless site on someone’s skin, replicate it, and then use the clone stamp to cover the problem regions, the problem is fixed.
Apply the stamp repeatedly to the imperfection until it is completely concealed. Then, with the aid of the clone stamp, your topic will seem faultless.
Healing Brush
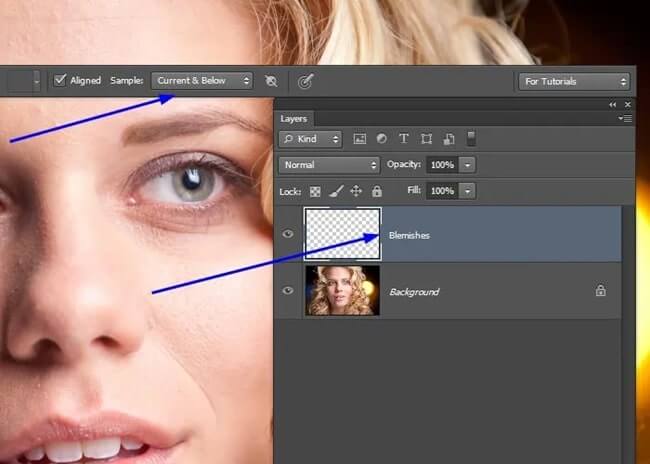
When using a healing brush, you are not just copying a blemish-free skin area. Instead, the flawless skin area is copied and pasted onto the flawed site. However, unlike the clone stamp, pasting also involves integrating the copied area into the defective area. This means you reproduce a perfect place, paste it onto the site with blemishes, and the healing brush will integrate with that area to match the texture.
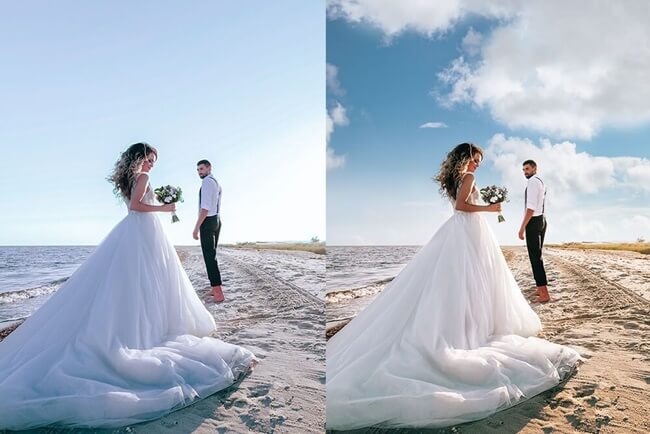
Shadows & Highlights to make the photos brighter
The awkward lighting setup of the wedding venue affects the photos, resulting in badly-lit images. In addition, it may happen that the couple is standing behind an intense light, which makes them look almost invisible in the photograph. You can change these issues by adjusting the shadows and highlights in Photoshop.
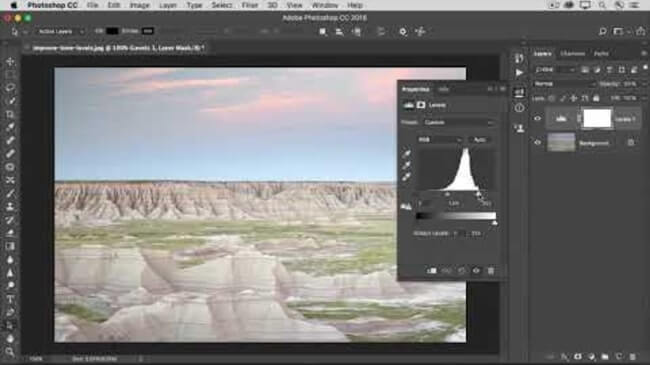
Here’s how to adjust shadows and highlights:
- Select the Shadows/Highlights settings under Adjustment on the Image Tab.
- To reduce the shadows’ strength and eliminate the image’s dark highlights, adjust the Shadows and Highlights slider to the right.
- To find the Curves Adjustment option, click Okay. Your picture will appear a lot better if the auto adjustment is used.
Photoshop Culling for Creating Story
Be mindful of editing the story while choosing which pictures to preserve. If you’ve covered all your bases throughout the shoot, maybe you’ll be able to put together clips from each scenario that can be juxtaposed on blogs and spread in picture albums afterward. A succession of broad, medium, and tight angles makes up a solid spread.
Blur the background to give the entire focus on the subjects
The background is always a vital element of a photograph. You can blur the background while shooting the wedding photos to emphasize a particular item of the bride or groom, such as the bride’s earrings, the groom’s watch, or the couple’s wedding rings. Also, background blurring works to give an entire focus on the facial expression of the bride and groom. It is essential to show the bride and groom’s emotions on that particular day.
Here’s how to blur the background using layers in photoshop:
Step 1: Select the subject by using the Select drop-down menu.
Step 2: Fine-tune the subject to avoid the ghostlike edges.
Step 3: Create a new layer mask of the subject.
Step 4: Go to the background layer and use the Filter menu to select the Blur tool. Thus blurring the background.
You can learn more about this process by looking at the dedicated logs on this topic from the Clipping World website.
Adjust Contrast
Enhancing the contrast levels in your wedding images is similar to improving the brightness or exposure. Once again, achieving the ideal harmony between the highlights and the shadows might be challenging for someone new to using conventional picture editing tools. However, you can still do it by consulting with an expert photo editor.
Final Thoughts
Wedding photo editing is a challenging and time-consuming task. Therefore, it would help if you practiced more and more until you got perfection in the editing. Also, it is essential to create dreamy effects to give some outstanding wedding photos to the clients. In this regard, it is best to get a wedding Photo Editing service from a Photoshop expert. Thus you can get your desired photos quickly and at an affordable rate.
FAQ